
Bike Cleaning
January 4, 2021
Getting our bikes dirty is a good thing! It shows that we are riding and having fun. One of the easiest ways to prolong the life of your bike and keep it operating smoothly is to clean it up after creating those fun, muddy memories. In this blog, we will cover the materials needed, cleaning priorities and a breakdown on how to care for each part of your bike.
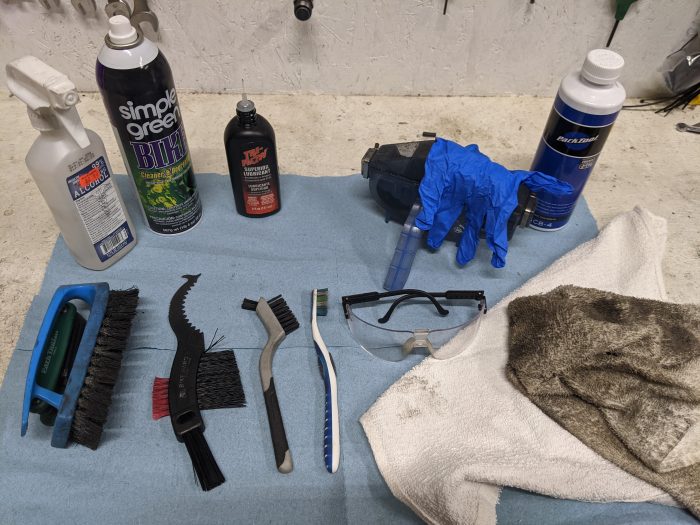
Materials needed: (See Figure 1)
- Bike Repair stand (or some way to keep the bike upright on its own)
- Variety of brushes and rags
- chain degreaser
- chain lube
- Runner gloves
Cleaning Priorities
When we talk about cleaning our bikes, there are parts that are more important to keep clean. You will want to focus on the parts that move the most. This includes the chain, chainrings, rear gears, fork and dropper seatpost stanchions and pivot points if you have full suspension. Parts that don’t move while you ride, like the frame and handlebars, can be cleaned less frequently.
Frame
There are a couple different strategies for cleaning frames, depending on how much mud or dirt is on it.
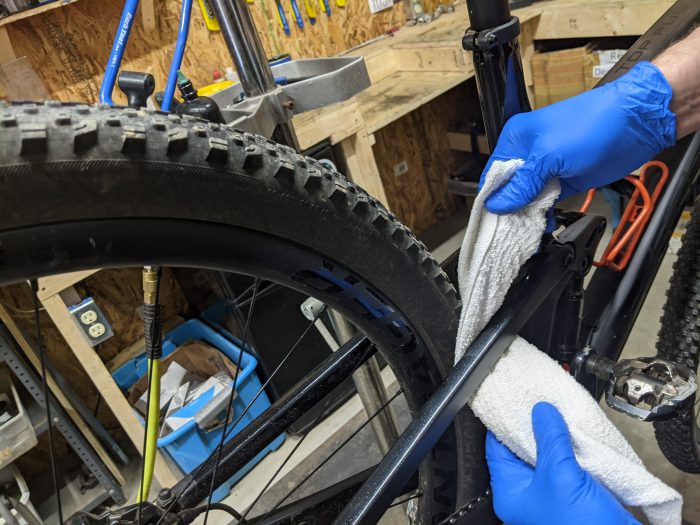
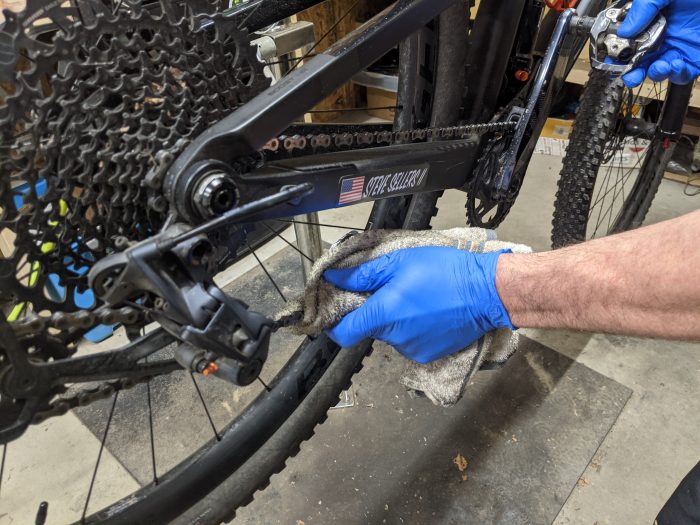
For bikes that have a coating of dust or a small amount of mud, a rag with soap and water in a spray bottle will work great. Spray and wipe down the whole frame, paying close attention to the small spaces, including the area around the cranks and near the tires. Taking the wheels off can be useful, but you can often use a towel to clear most of the mud (See Figure 2).
For a very muddy bike, you may have to use a hose. This should only be done when it’s absolutely necessary. Spraying large amounts of water at high pressures can strip grease away from very important areas like the hubs at the center of your wheels and the bottom bracket which houses the bearings that keeps your pedals spinning smoothly. I like to use a low pressure spray setting and a soft brush to loosen up the mud. A bucket with soapy water can help out a bunch!
Fork and Dropper Seatpost
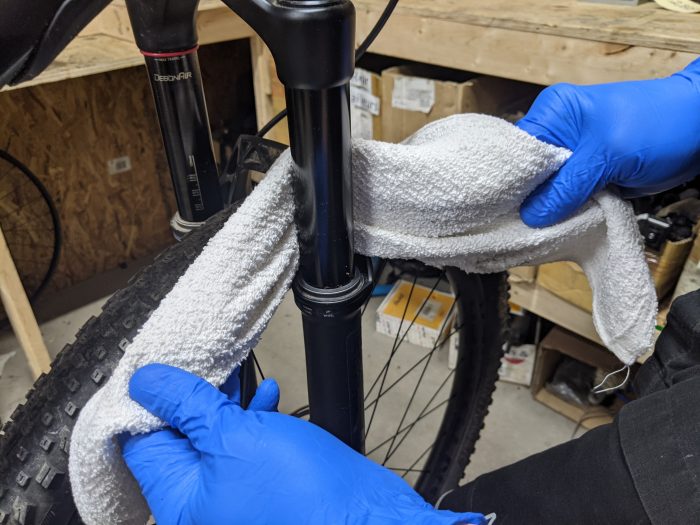
Post-ride fork cleaning is pretty easy and important. The focus should be on cleaning the stanchions, which is the part of the fork that moves into and out of the lower legs where your wheel attaches. Removing dust and debris from the stanchions will help keep the seals on your fork in better condition for longer. This can be done with a rag (See Figure 3). Follow the same procedure for cleaning your dropper seatpost.
Drivetrain
Our drivetrain includes all the parts that help our bike move forward: cranks and chainring(s), chain, rear cassette (gears, and derailleurs, which move the chain when shifting. This is arguably the most important part of your bike to focus on while cleaning. Keeping our drivetrain clean will help maintain crisp shifting, decrease the wear on all the parts and save you money in the long run. When there is sand or other particles on the moving parts of our drivetrain, it works like sandpaper and grinds away at the metal parts, which causes us to replace them sooner. This affects the teeth on our chainrings, cassettes and chains.
Drivetrain Cleaning Steps
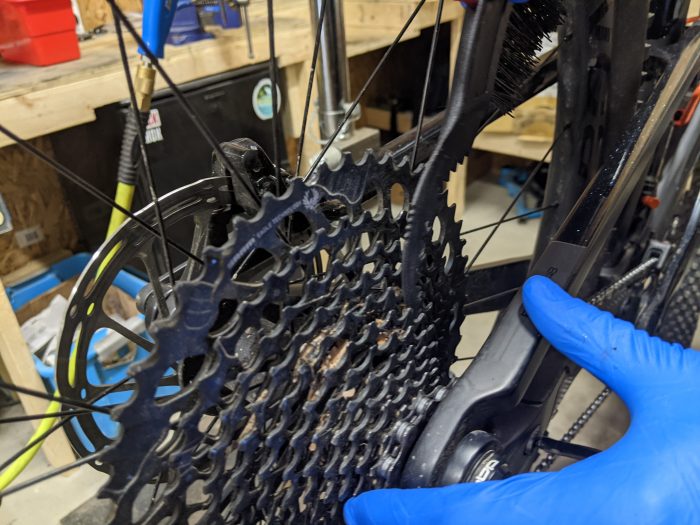
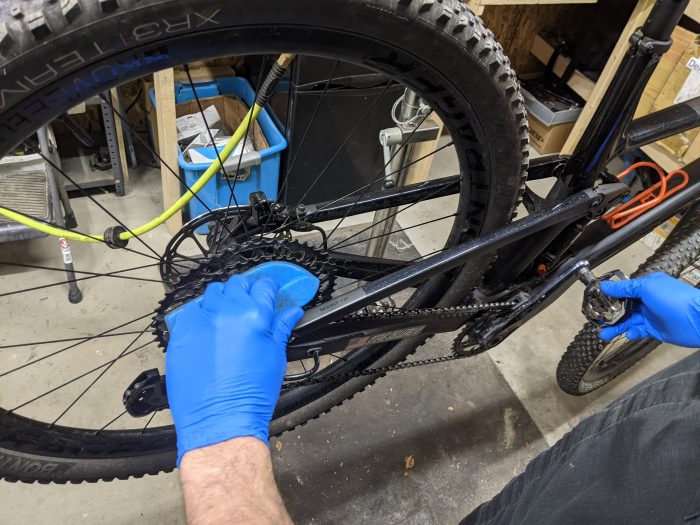
- Remove all leaves, sticks and other large debris from the cassette using a specialized tool or something narrow like a pick. (See Figure 4)
- Hold a dish brush in your left hand against the cassette and pedal forward. Brush the whole cassette to remove particles, moving the chain to a different cog will help you hit them all. (See Figure 5)
- Apply degreaser directly to the chain or onto a rag to remove to particles from the chain. With a rag, grab the chain on the bottom, lightly pinching the sides, pedal backwards until enough of the particles are removed. Switch to the top and bottom of the chain to clean off the rollers and repeat the process. (See Figure 6)
- Use a stiff brush to remove the grease, dirt and sand from the front chainring(s).
- Use a rag or brush to remove debris from the small gears on the rear derailleur (jockey wheels)
- Apply your preferred chain lube to the chain. There only needs to be one drop on each of the rollers for proper lubrication.
- Shift through the full range of gears to get the lube worked into the chain.
- Using a rag, wipe down the chain by grabbing on the bottom and pedalling backwards. Removing the excess lube will help to keep it clean in the future.
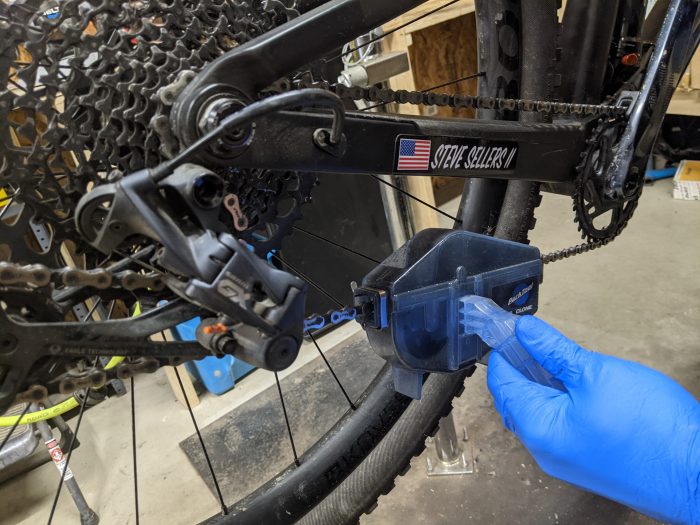
There are manufactured chain cleaners that can help with this process. These will apply degreaser, scrub and brush all sides of the chain at once. (See Figure 7)
Wheels
In general, it’s fine for our wheels to be a little dirty. Depending on the types of brakes you have, there are different areas on which you’ll want to focus.
Disc brakes – You will want to use a totally clean new rag with Isopropyl alcohol for cleaning. If oils from the chain, our hands, or other cleaning supplies get on the rotor it can contaminate the disc pads and make for very noisy braking.
Rim brakes – Use isopropyl alcohol or soap and water to clean off the braking surface on the rim. This is part of the rim that the brakes grab onto. Over time, these get dusty. Keeping them clean can dramatically improve your brake performance. You can spot clean the rest of the wheel with a wet rag. Cleaning the rest of the wheel is less important but it can get your bike looking brand new.
Cleaning Frequency Guidelines
- Frame – As needed, try using as little water as possible
- Drivetrain – Every 3-4 rides, or if you start hearing creaking sounds or experience shifting issues
- Fork and Seatpost – After every ride, or as needed
- Wheels – As needed based on brake performance or appearance
Now it’s time to clean your bike! Refer to this information while you clean to make sure you hit all the important spots. Feel free to swing by the Bike Farm to use our bike cleaning station by the shop!