
How To Adjust Rear Derailleurs
June 26, 2021
Are you tired of hearing clicking noises from your chain while riding? Does it take extra time for your bike to get in the gear you want it to be in? These problems are usually pretty easy to address! In this blog, we will be talking about how to make adjustments to your rear derailleur to improve your shifting and prevent future problems. We will cover the basic rear derailleur setup, diagnosing problems and cable tension. This blog will show you tricks to make minor adjustments in between tune-ups at the shop.
There are three main components to the shifting system: shifters, cables and housing, and the derailleurs (see Figure 1). All shifters that use a cable will serve the same purpose — to pull or release a specific amount of cable. The cable and housing that runs from the shifters to the derailleurs are what allows the derailleurs to move side to side, which changes the gear that our bike is in. Derailleurs are controlled by the shifter but they have some settings we want to look at before making adjustments.
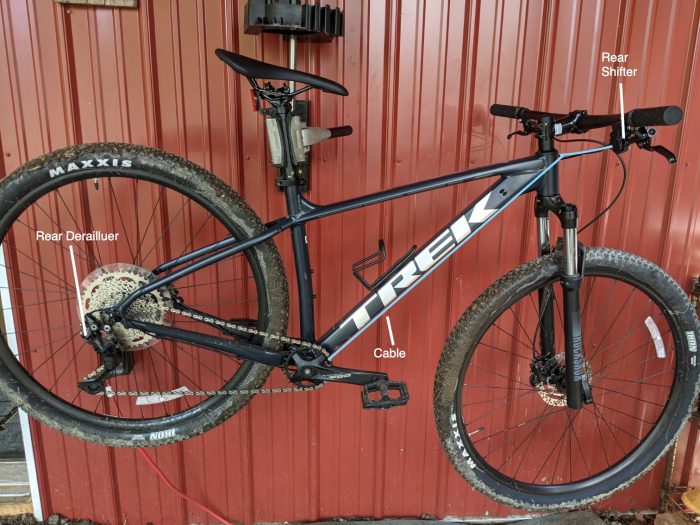
Figure 1 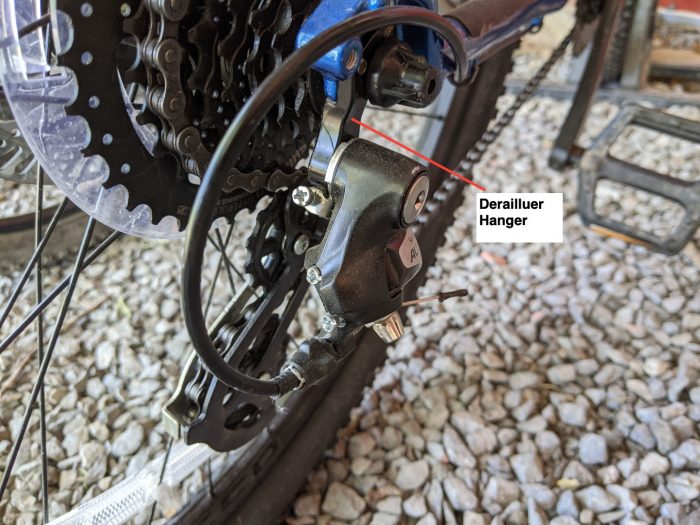
Figure 2
Derailleur Set-up
Derailleur Hanger
As seen in Figure 2, the derailleur hanger is what the derailleur attaches to. These are very specific to the frame of the bike and are intended to bend and break before the more expensive derailleur does. If these do get bent it will cause shifting problems that can’t be fixed until the hanger is replaced. Make sure the hanger is nice and straight.
Limit Screws
High and Low Limit Screws
As seen in Figure 3, there are two screws that will prevent the derailleur from moving into the spokes and the frame on the smallest cog. These may be labeled High and Low and can be adjusted with a Phillips screwdriver or some require an Allen key. The high limit screw will prevent the derailleur from moving into the frame when the chain is on the smallest gear in the back. The low limit screw will prevent the derailleur from moving into the spokes. Make sure that the small jockey wheels on the derailleur line up with the appropriate gear when making these adjustments. The positions of these screws vary by the derailleur. Figure 4 shows another common example of limit screw positioning.
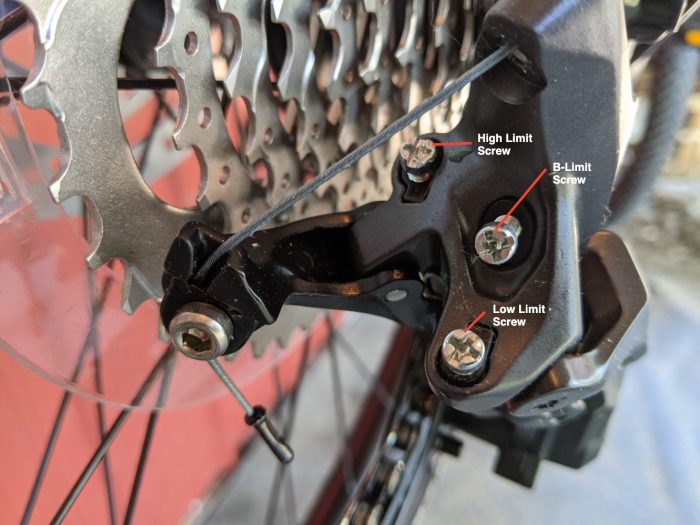
Figure 3 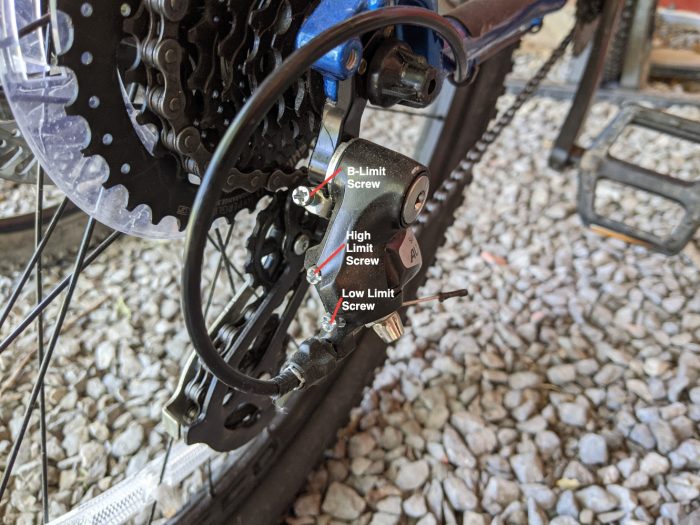
Figure 4
B-Limit Screw
The B-limit screw will adjust how close the jockey wheel is to the gears. We want to have 6-10mm of space.
When our bike is assembled at a bike shop these adjustments will have been made. Most of the time we will not need to mess with them but we want to make sure they are set up properly.
Diagnosing problems
Before we can figure out exactly what is going on, we will need to clean off our chain and gears. Check out our Bike Cleaning Blog for cleaning tips. If our bikes are clean, most of the problems that we run into with our shifters are focused on cable tension. Different problems arise if there is too much or too little tension on the cable.
| Too much cable tension | Too little cable tension |
| Chain will not move into a harder (smaller) gear. When shifting into an easier gear the chain catches on the next largest gear Won’t shift into the smallest gear | Doesn’t immediately shift into easier (bigger) gears Won’t shift into largest gear |
With your rear wheel off the ground, you will be able to see which of these symptoms your bike is experiencing.
Figures 5 and 6 show us our barrel adjusters. Barrel adjusters allow us to make small adjustments in the tension that’s on the cable. Not all derailleurs will have barrel adjusters on them so in those cases just use the ones on the shifter. Refer to Figure 7 to see how to increase and decrease tension. When making adjustments we want to make small adjustments. Start by turning the barrel adjuster a quarter or half a turn. Do this until you are getting smooth and crisp shifting in both directions.

Figure 5 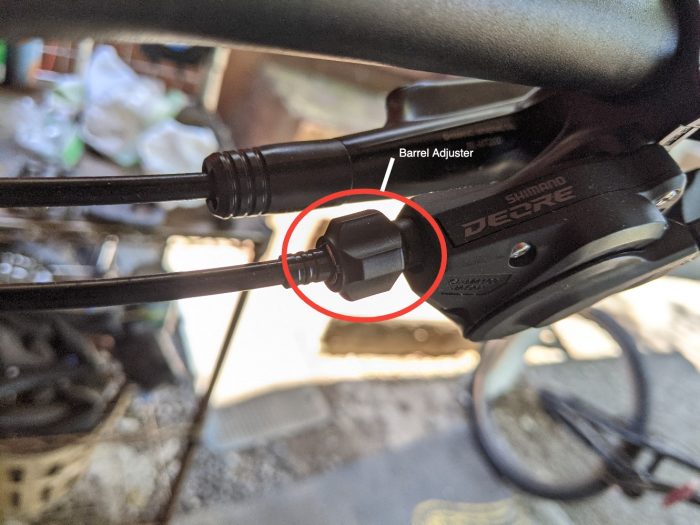
Figure 6 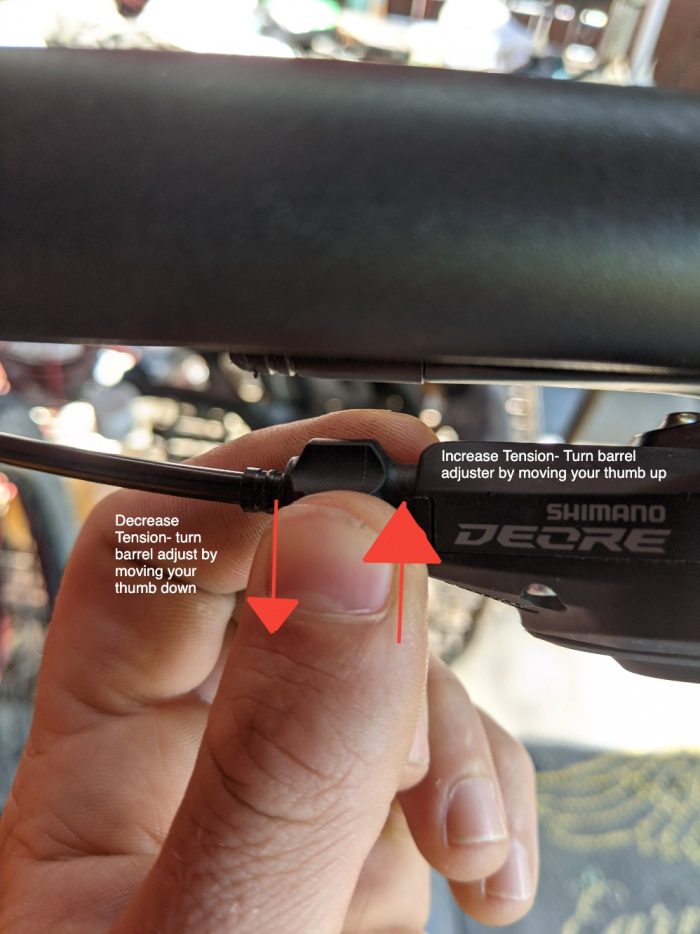
Figure 7
If no matter what you do, the derailleur will not come down into harder (smaller) gears it may be time to look at replacing the cables and housing. Over time dirt, dust, and other particles can get into the housing which will prevent the cable from moving through it. This is a regular part of bike maintenance and it may be time to have them replaced. This may be a project to have the shop take care of for you.
Thank you for taking the time to learn a little bit more about how to take care of your bike! Making adjustments to our bikes can be tricky but the more you practice these skills, the easier it gets! Have fun riding!