
How To Tune Kids Bikes
March 16, 2021
Getting kids to ride their bikes is a lot easier if everything is working correctly on said bikes! In this post, we will be covering how to perform a safety check on a kids bike (including the tools needed), how to ensure that the bike is performing correctly, and how to care for your kid’s bike throughout the season.
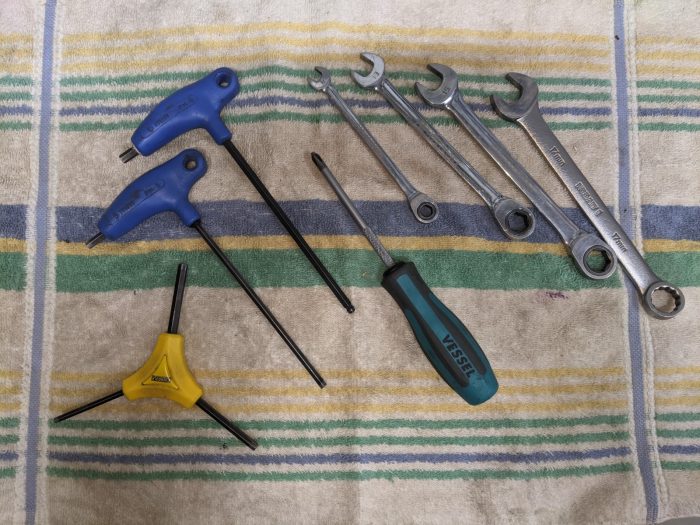
Tools Needed: Set of Allen wrenches/hex keys (13mm, 15mm) and Phillips screwdriver
There are 4 components to the safety check: nuts and bolts, tires, brakes and the headset and bottom bracket. We are going to start at the front of the bike and work our way to the back.
Nuts and Bolts
The first bolts we are going to check are the stem bolts (as seen in Figure 1). When tightening these bolts you want to make sure the bars do not rotate when we push or pull on them.
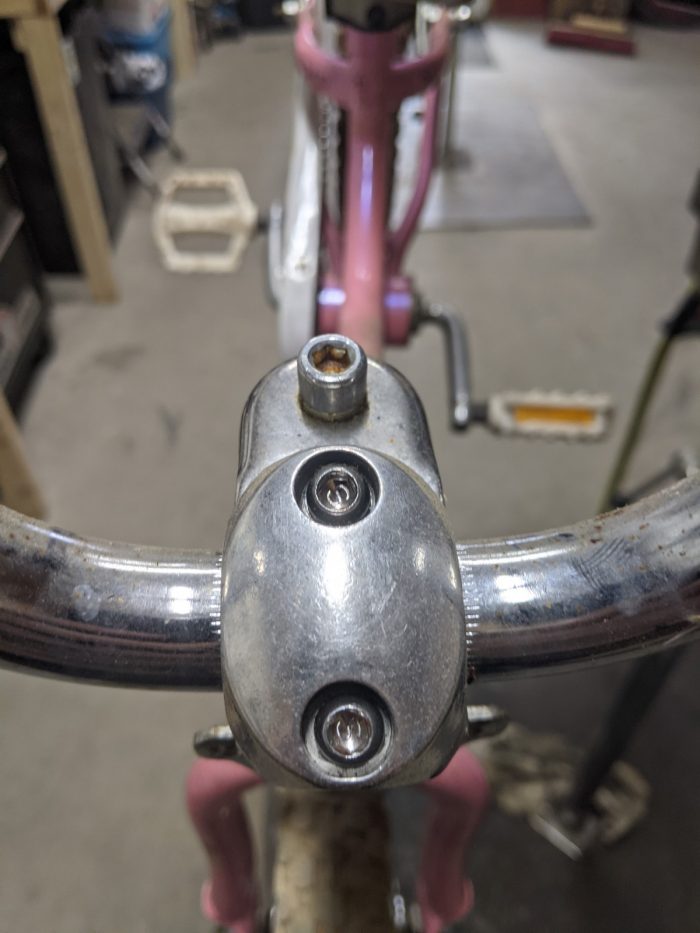
Figure 1 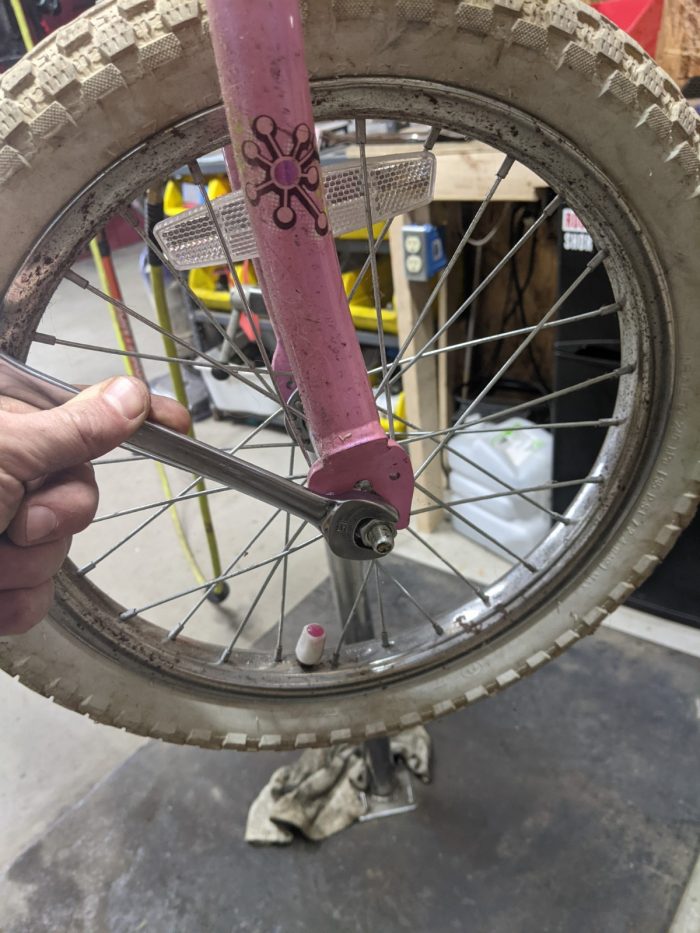
Figure 2
The next part to check are the nuts that hold the front wheel in place. From the front of the bike, look at the spacing between the tire and fork on both sides to make sure it is equal. This will help confirm that the wheel is fully in the dropouts for safe operation. With a 15 mm wrench, check the tightness of the bolts on both sides of the wheel (See Figure 2). You shouldn’t need to tighten it as much as physically possible, but you do want to make sure there is no play or sound coming from the wheel when you bounce it on the ground.
Using the15 mm wrench, you can confirm that the pedals are properly tightened — these should be pretty dang snug (See Figure 3). If the pedals are not properly tightened it can cause damage to the crank and will result in your kid having to push their bike home.
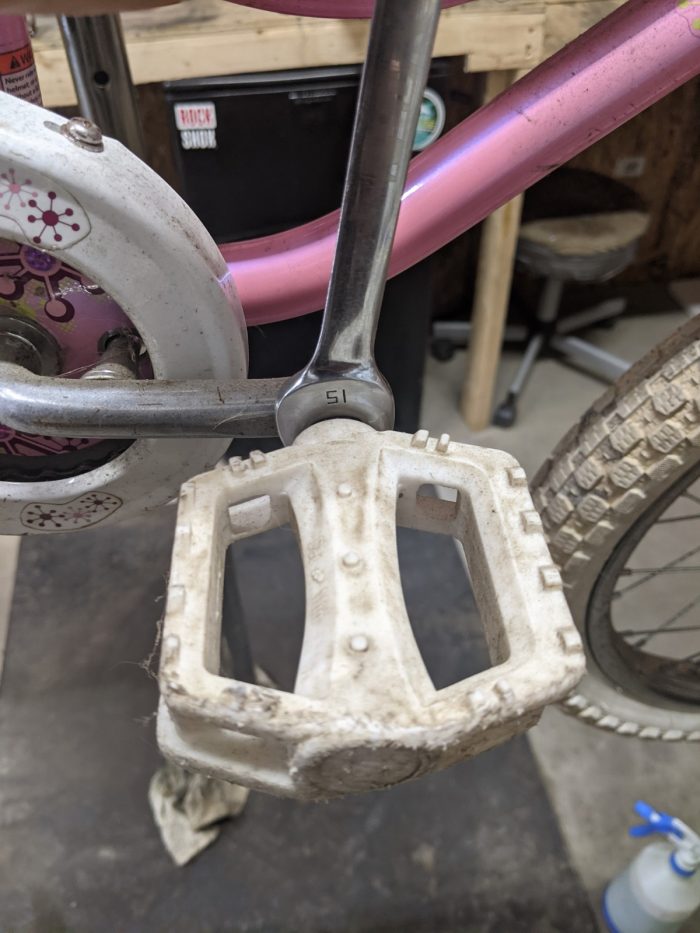
Figure 3 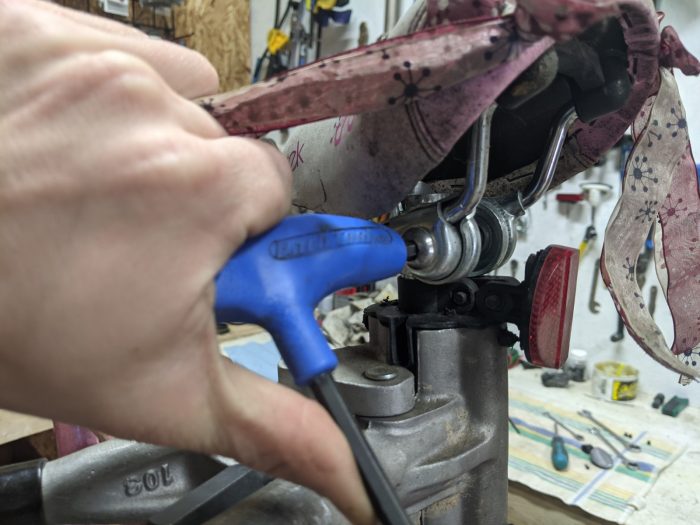
Figure 4
We will now check the seatpost clamp bolt and seat clamp. On kids bikes, these nuts usually require a 13 mm wrench to adjust, but some do have Allen Keys in the 3-6 mm range. After properly adjusting the seat height for your rider, tighten the nut until the seat no longer moves. Look at the seat clamp as seen in Figure 4. This nut helps to secure the seat itself and can be loosened to make adjustments to the positioning of the seat. However, if it feels comfortable to your rider, you can just confirm that it is nice and snug and that the seat will not move.
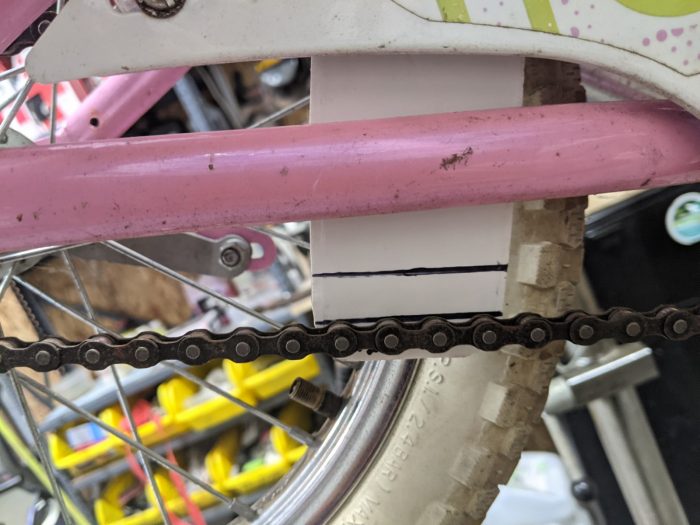
Figure 5 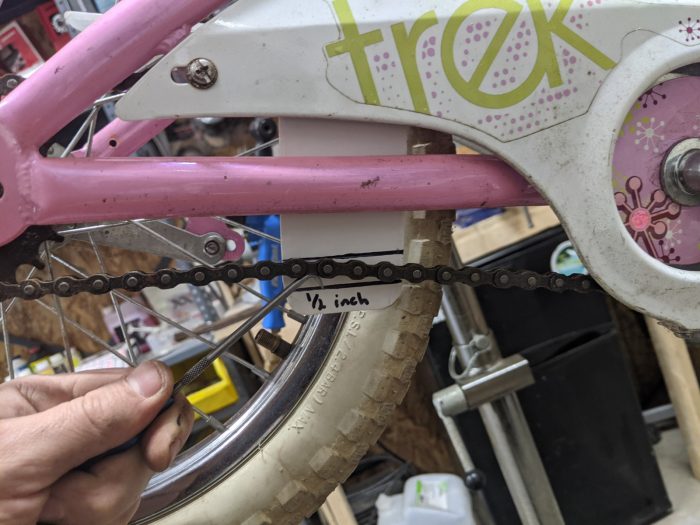
Figure 6
We will finish our nuts and bolts check with the rear wheel. This is an important spot to check because it impacts the tension of the chain on single-speed bikes. Chain tension is critical for improving the performance of your kid’s bike. If it is too loose, the chain will fall off and braking will be delayed or lost. If it is too tight, it will make it harder for the rider to pedal forward, making getting up hills or going on longer rides more difficult. Looking at Figures 5 and 6, you can see that you’ll want about a .5 inch of deflection in the chain. This will get our riders pedaling safely and efficiently. To add tension to the chain, loosen the nuts on each side and move the wheel back until the chain gets tight, retighten the nuts and check for the half-inch of deflection. Some bikes have chain tensioners as seen in Figure 7. Loosening or tightening the nut on the back will move the wheel in the dropouts, decreasing or increasing the chain tension (See Figure 8).
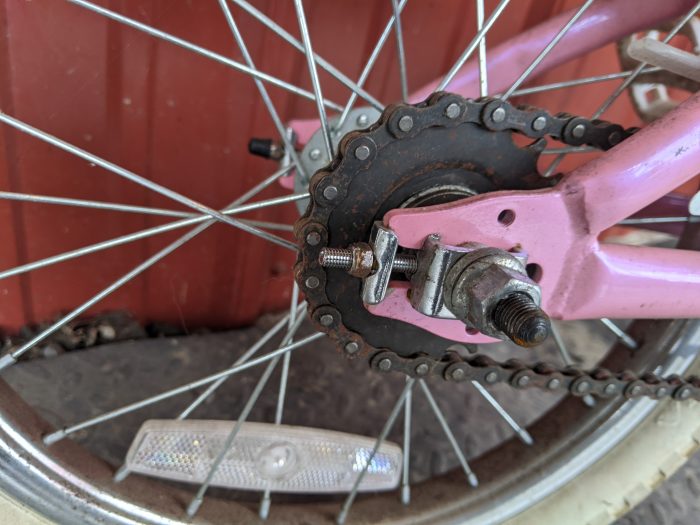
Figure 7 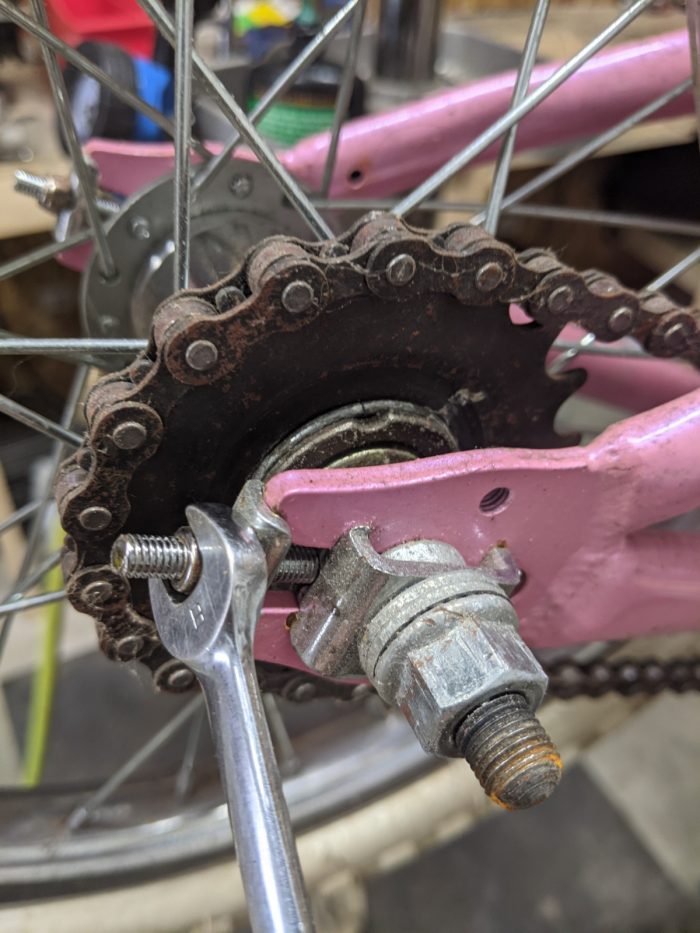
Figure 8
Next, we are going to check the bolt that secures the brake. It will be on the side of the bike without the chain on the chainstay (See Figure 9). This bolt attaches a small arm from the hub to the frame and is required for the coaster brake to engage when your rider pedals backward. Ensuring this is snug and testing to see if the brake works will keep your rider safer. If the brake does not work it is best to take it to a shop.
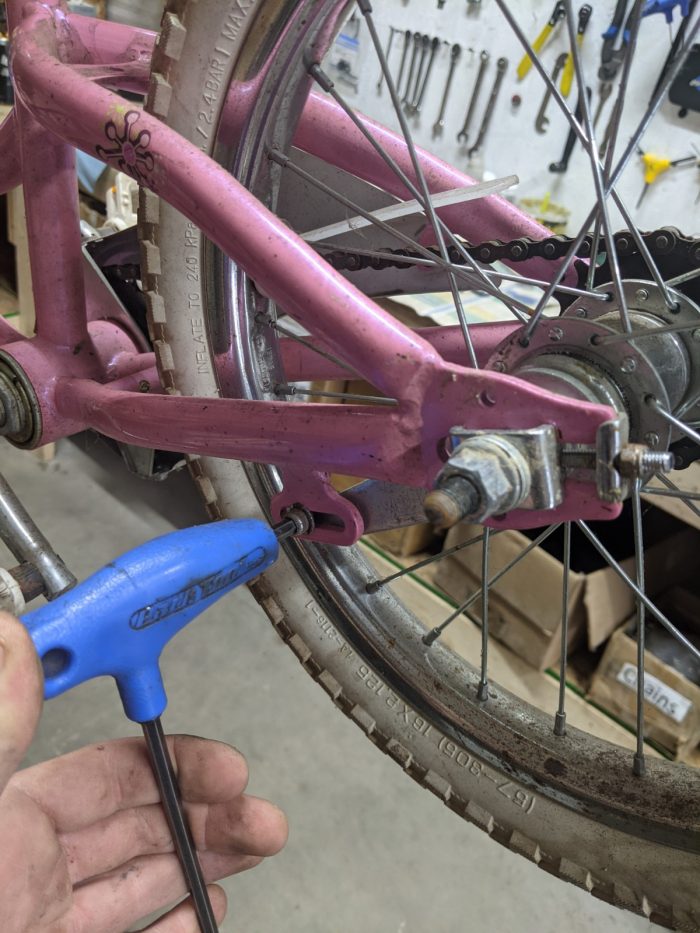
Figure 9 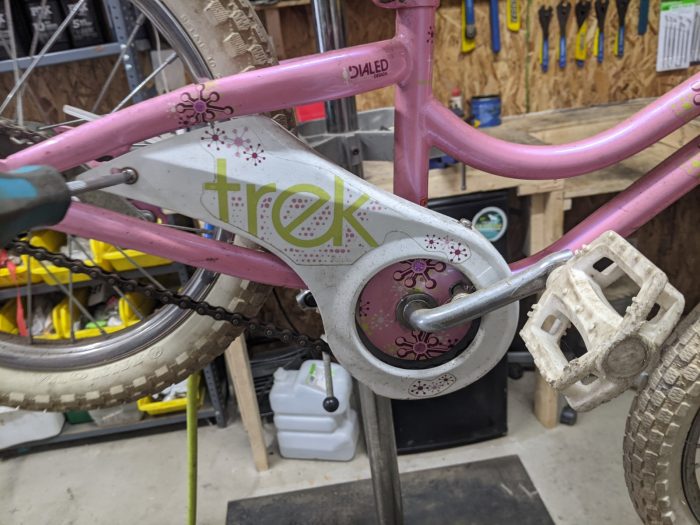
Figure 10
The last part of checking the nuts and bolts will be looking at the accessories on the bike. These could be fenders, chain guards, baskets and bells. Often these are secured with a Phillips head screwdriver as seen in Figure 10. You want these to be tight enough to not rattle or come loose while the bike is being ridden.
Tires
Now that we have inspected all of the nuts and bolts, we will move on to assessing the tires. When you are looking at tires, you want to check for tire tread, the ability to hold air, any cracking from age, or any damage to the sidewalls. Kids tend to wear out the back tire first for a couple of reasons: 1. coaster brakes tend to be used in an on/off manner and 2. skidding is cool when you aren’t on the trails. Skidding will eventually lead to you needing to replace the tire. When tires start to look like they do in Figure 11, you may want to consider either replacing or rotating the tires. Since there is still some tread on the tire, you could move it to the front of the bike to get a fresh one on the back. This will buy you some time before you need to buy new tires. Rotating the tires is only a good idea if there is usable tread left. If you start seeing entirely bald patches or thread showing though it is, from a safety standpoint, very important to replace the tire.
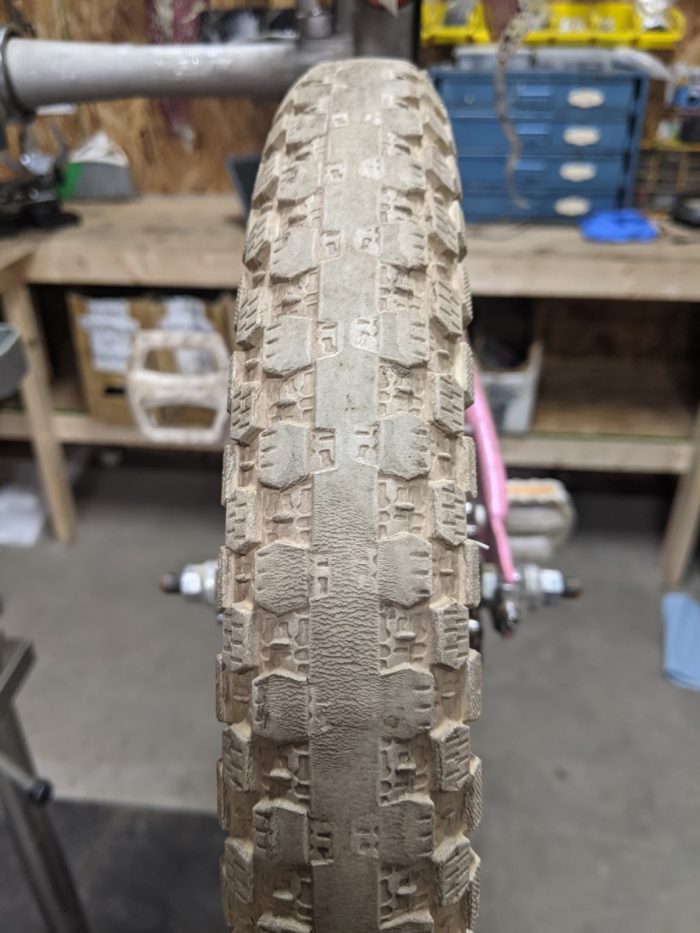
Figure 11 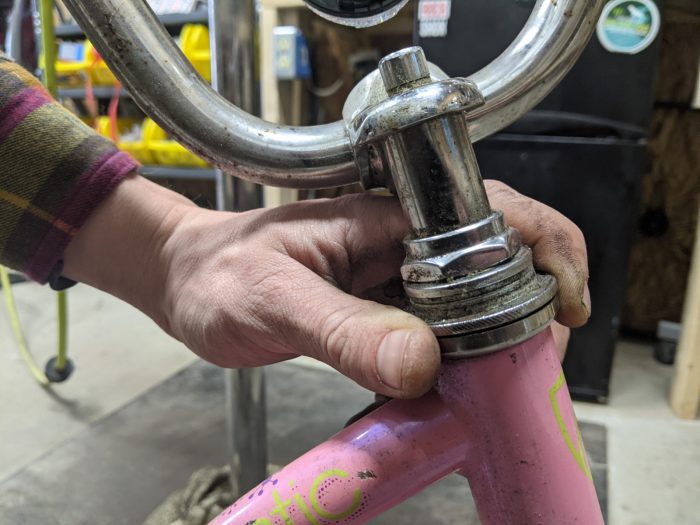
Figure 12
Headset and Bottom Bracket
The last two spots we are going to check are the headset and the bottom bracket. The headset is what supports the fork in the steerer tube on the bike. To check its security, hold the bike as shown in Figure 12. Turn the handlebar to the side, and push the bike forward and back. If you feel any movement between at the seam our finger touches, then it is important to have it adjusted by a bike shop. This is a very important area that is essential for the safe operation of the bike and should be adjusted properly.
The bottom bracket is connected to the pedals and crank arms that go through the frame. You can check that it is functioning properly by supporting the bike between our legs, grabbing onto each of the crank arms, and alternate pushing and pulling up on both sides. If you hear knocking sounds or feel movement, it is good to take it to a shop. These require specific tools to adjust and service, and damage can be done to the bike if it is not serviced properly.
The final step is cleaning the bike and lubing the chain. Check out our Bike Cleaning Blog for more information on this process. After you have gone through all of the steps and corrected any problems you have come across, your kid should be good to ride! It’s good to check over the bike a couple of times throughout the season. This will include conducting a safety check, cleaning the bike and lubing the chain.